
So you had to say goodbye to a tree. It’s a bummer, but hey, sometimes it gotta be done. Now you’re left with a crater in your yard and wondering how to level the ground after tree removal. No worries, mate! Turning that eyesore into a stunner again is totally doable.
How does tree removal affect ground levelling?
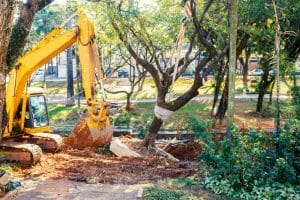
Tree roots are like nature’s anchors, holding the soil in place. When a tree gets chopped, those anchors come up with it, leaving a big empty space. This space causes the ground to sink and become uneven. Not exactly the backyard oasis you were picturing, right?
What tools are needed to level the ground after tree removal?
To level your ground after the tree removal, you’ll need a few basic weapons:
- Shovel: Your trusty dirt-moving machine for digging and shifting soil.
- Rake: For smoothing things out and spreading soil like a pro.
- Tamper (or something flat and sturdy): This bad boy will compact the soil, making it nice and firm.
- Level: To check, you know, how level things are. Makes sense, right?
- Wheelbarrow (optional): Got a dirt mountain on your hands? This will keep your back happy.
How to prepare the area for ground levelling?
Before you jump in and start levelling, you gotta get the area prepped:
- Clear the debris: Get rid of any leftover wood chips, branches, or rogue roots that the tree removal crew might have missed.
- Mark your territory: Use spray paint or string to mark the borders of the area you want to level. Think of it as your levelling zone.
Heads up! Before you grab that shovel and go all-in on levelling, check with your local council about tree removal permits. It’ll save you a headache (and maybe some cash) down the line if a gotta-go tree throws a curveball in your plans.
How can you fill the hole left by a tree stump?
The size of the hole will determine your battle plan:

- Small holes (think kiddie pool size): Just fill it straight up with topsoil. Get a good quality mix that will help new plants thrive.
- Large holes (bigger than a kiddie pool): Conquer this beast in stages. First, lay down a layer of subsoil or crushed rock for drainage and to stop the ground from sinking too much. Then, top it all off with fancy topsoil to create a level surface for planting.
Tip: Don’t just dump the soil in and walk away. Add it in layers and tamp it down firmly after each one. This stops air pockets from forming and keeps your ground nice and stable.
What are the best practices for compacting soil after tree removal?
Compacting the soil after filling the hole is your secret weapon against future dips and unevenness. Here’s how to do it:
- Grab your tamper (or trusty flat object) and compact the soil layer by layer.
- Give the filled area a gentle drink with the hose, but don’t overdo it. A little water helps the soil particles snuggle in tighter.
- Keep adding and tamping soil until the filled area is level with the rest of your yard.
How do you ensure proper drainage when levelling ground?
When levelling the filled area, remember, understanding drainage for healthy lawns is key! Make sure the filled area slopes slightly away from your house or walkways to prevent water pooling and creating swampy patches in your yard. You can use a level to ensure proper drainage for future lawn success.
Tip: Use your level to make sure the filled area has a gentle slope for happy drainage.
How long should you wait before planting new grass or plants?
After levelling the ground, hold your horses on the planting party. Waiting a few weeks allows the soil to settle completely. This minimises the risk of new dips or unevenness popping up after you plant your goodies.
Here’s a quick guide:
- Seeding: Wait 4-6 weeks. This lets the soil settle and any sneaky weeds germinate (which you can then promptly evict).
- Sodding: You can lay sod straight after levelling, as long as the soil is nice and firm.
What are common mistakes to avoid when levelling ground after tree removal?
Levelling the ground after tree removal might seem easy, but there are a few rookie mistakes to dodge:
- Leaving debris Behind: Those leftover roots and woodchips can mess with drainage and settling.
- Not Filling Enough: A skimpy fill job can lead to future sinking and unevenness. No bueno.
- Skipping the Compacting: Uncompacted soil is a recipe for dips and uneven ground. Not ideal.
- Planting Too Soon: Planting before the soil settles can create unevenness as the ground shifts. Patience is key!
Conclusion
So there you have it, folks! Levelling ground after tree removal isn’t rocket science. With a little elbow grease, the right tools, and these handy tips, you can transform that eyesore into a level and plantable space. Remember, the key is to take your time, prep the area properly, and fill and compact the hole in stages.
The yard to the rescue From tree trouble!
Conquered that levelling mission, legend! Now it’s time to think about what will fill that awesome space. But hey, let’s be honest, sometimes levelling isn’t the fun part. Saying goodbye to a tree can be a real bummer.
If you’re in Melbourne and in need of help in removing a tree, don’t sweat it! The Yard is here to assist you. Our crew of qualified arborists are the best in the biz – we’ll take care of your tree removal safely and efficiently, leaving you with a clean slate (and a perfectly level one, if you follow this guide!).
So, if a stubborn tree is casting a shadow over your backyard dreams, contact The Yard for tree removal services. We can handle the tricky removal, and you can focus on the levelling and landscaping fun! We’ll have that backyard paradise blooming in no time.